Version 5.0
Version 5.0 |
MrSid Extension |
|
1) Overview: |
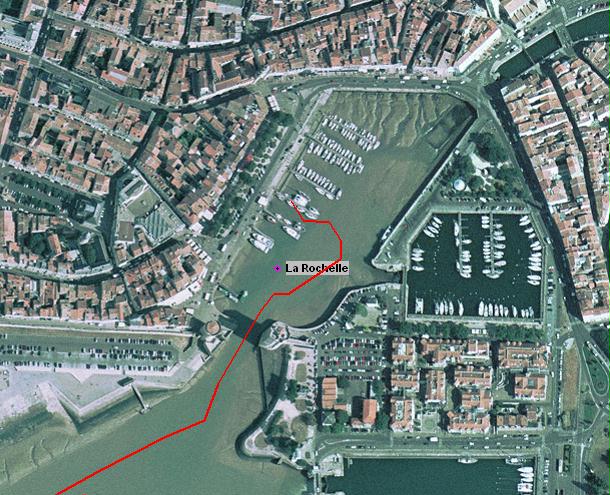
The MrSid format is a cartography format used in air and satellite photography. Although they are not true nautical charts, these photographs are taken into account by scannav with same functionalities as regular charts (superposition of the boat, calculations of distances, etc...) Support of the MrSid format needs the installation of the MrSid extention To date, 2 sources of MrSid files were tested: 1.1 : Orthophotos of the French littoralAerial photographs of the French coasts are available for free download at http://siglittoral.test.application.equipement.gouv.fr/ (French "Equipement"'s web site). These photographs have a resolution of 50 centimetres per pixel.They can be incorporated in ScanNav as maps providing a small import process described further in this document. Warning: Allthough the precision of positioning is excellent, they are only an additional aid, and are not meant to replace nautical charts.
1.2 : Nasa Satellite photographs (World coverage)These satellite views can be downloaded free from the NASA web-site at https://zulu.ssc.nasa.gov/mrsid/. They are in UTM projection system, have a precision about 15 meters per pixel, and cover the whole world. Once downloaded, you can read them directly in ScanNav without any import process to perform, provided that the MrSid import module is downloaded and installed as indicated below.
Each downloaded file represents an UTM zone of approximately 7° of
longitude (6° for one UTM zone plus partial overlap of the adjacent
zones), and of approximately 5° of latitude. Two adjacent zones in
latitude will be connected perfectly. But the characteristics of the UTM
projection system makes connection of adjacent zones in longitude not
possible. You will thus observe a shift at the junction of these UT zones.
However, the rather large overlap between each UTM zone makes it possible
to use only UTM zone at a time. |
2) MrSid module Installation: |
Download the MrSidModule.zip and unzip the 3 included files (mrsidinfo.exe, mrsiddecode.exe, and IgnLambert.exe) in the installation directory of ScanNav (by default "C:\ScanNav"). ScanNav reserves itself the possibility of requiring a participation for this functionality. Therefore, support of MrSid format is protected by a specific license code. This license is however provided free for now. To obtain it, just make a request by mail, attaching the ScanNav.cfg file resulting from the "Register" formula. Notice: The MrSid module uses the components mrsidinfo.exe, mrsiddecode.exe which are the property of LizardTech: www.lizardtech.com
|
3) Import of Lambert Aerial photos in ScanNav: |
|
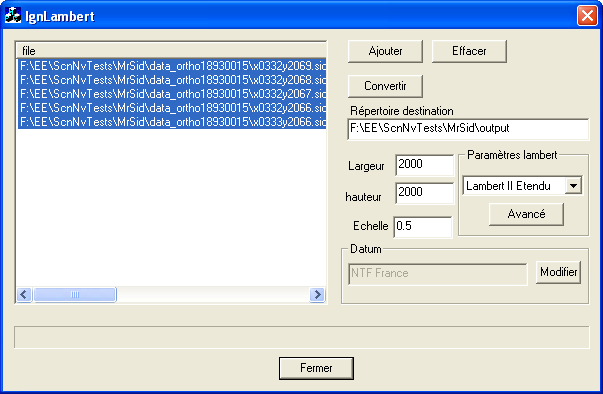
- Go to the ScanNav installation directory, and launch the IgnLambert.exe programm (you may manually make a short-cup of this program on your desktop to find it easyier afterwards) The following window shows up: - Enter a valid directory where the resulting charts will be saved (
in above example it is F:\EE\ScnNvTests\MrSid\output)
The chart is now finished and can be inserted in the charts library as any other map. Be aware thow that these maps are in the Lambert projection, which is different from the Mercator projection used for Nautical charts. Therefore, they cannot adjust together exactly, and you shouldn't put both in the same library. If you do so, you will watch some large shifts are the border of the maps, even if positions on each map are good (if you enable the scannav grid you will see it distoorted at the border of different projection maps) |