Introduced with version 24.0, this service is available for any up-to-date license.
Compared to other existing services, it has the advantage of including all the details of the track, as well as other possible information (waypoints, routes, etc.), is independent of the means of transmission, and does not require any additional subscription.
Sending can be done either manually, or automatically at a time interval defined by the user.
This service will be enriched subsequently, including the use of means of communication such as email.
The operating principle is as follows:
Before sending any positions, you must create your space on the server. This is done directly from ScanNav.
- The top part allows you to create your space and personalize the consultation web page. On first use, you must indicate the name of the ship which will appear in the title of the page, as well as a password to be communicated at the same time as the URL to consult the page. You can also indicate your MMSI number. If this is entered, a 2nd map is displayed with AIS tracking information from Vessel Finder when available. Click the "Apply" button to send the information to the server, and "View" to visit your page. These information can be modified at any time, always from the ScanNav interface.
- The lower part allows you to configure the periodic sending of your position
- Tracking active: Enables/Disables automatic position sending. The sending period can be set in minutes or hours. Note that no information is sent if GPS is not active.
- Include track details: If checked, all intermediate points since the last report are sent in order to have the exact curve of the route. The "Minimum step" allows you to moderate the number of points, and corresponds to the minimum distance in meters between 2 successive points.
- Journal points: If checked, a waypoint including all the information from the different sensors will be sent periodically.
- "Send position" button: Allows you to manually send the instantaneous position, following the same rules as automatic sending.
- Note that if no Internet connection is available when sending, the information will be sent together with the next attempt (from version 24.0SP1)
- Please note that sending any object(s) with this method replaces the existing database, including the incremental track. This will restart from the last point sent.
- Transfer takes place in the background, and a window opens when done, showing the URL to communicate to your contacts together with the password, so that they can view your journey on cartography.
- The data is sent compressed and the weight is of the order of a small Grib file, depending of course on the size and number of objects sent. To get an idea of the size it is always possible to export in KMZ before (the KMZ was added in version 24.0)
Several ergonomic improvements were made successively since versions 23.1 and 23.2.
- Repeaters: Improvements on the organization of repeaters (locking, grouped manipulations, alignments, etc...). See documentation
- Ergonomic improvements for tablets and ultra-high resolution screens: All dialogs can now be enlarged in order to display larger buttons and texts. See documentation below
- Toolbars and repeaters configuration: The layout of toolbars and repeaters is now remembered according to the screen configuration. You can thus have different configurations depending on whether you are in portrait or landscape, or single/multi-screen
New night vision mode (version 23.1)
- either by adding the icon to a custom bar (see main documentation on personal toolbars)
- either via the contextual menu (right click on the map) then use the "night vision" entry
 The "Off/On" button activates/deactivates the mode, the slider allows you to adjust the intensity (opacity of the layer), and it is also possible to define the base color.
The control window is closed by clicking outside the window, or, like any window, by clicking on the small cross at the top right.
The control window is not affected by night vision, which allows you to adjust while being sure not to make the window disappear because of too high an opacity. There is indeed no guardrail and by putting the slider completely to the right, the screen becomes completely black and we therefore no longer see anything through. Hence also the usefulness of access via the contextual menu to make it reappear if the setting is too high. (The menus are also not impacted by the night vision layer, they appear on top)
SNTides improvements (versions 23.1 and 23.2)
- Version 23.1: In previous versions, when requesting the water levels of a port while the currents module is open, the display returned untimely to the reference port attached to the currents file. This problem is fixed in version 23.1: a specific instance of SNTides is attached to the currents module, and independent requests for displaying the water heights of a port open in a new window. It is thus possible to have several ports displayed without having to launch SNTides instances independent of ScanNav
- Version 23.2: SNTides has a new calculation engine and additional features. See updated documentation for the SNTides module, as well as the improvements to the Currents module in version 23.2 later in this document
Real-time route followup (version 23.2)
- Changing waypoints while following a route can now be done according to 2 criteria:
- when entering the waypoint arrival circle as it was in previous versions
- when passing perpendicular to the waypoint, even if you do not pass through the arrival circle The configuration is done in the route monitoring window
- the current target waypoint's arrival distance is indicated by a red circle
Route waypoints (version 23.2 and 25.0)
To move several waypoints at the same time that belong to different routes, you can use the selection tool, or select them from the list of objects before moving them all together with the modification tool. All selected waypoints will then undergo the same movement.
Tips:
- You can use the keyboard shortcut "F3" to use the Selection tool temporarily, eliminating the need to switch tools between selection and editing.
- And to make selection easier from the objects window, consider using sorting by name or by position (click on the corresponding column header)
- All identical waypoints (same position and same name) are moved together when you move one, whether they are part of a route or independent.
- It is always possible to move waypoints individually. To do this, press the F7 key on the keyboard when you move the waypoint.
- It is possible in a hidden function to reverse the principle, i.e. by default only move all waypoints together when the F7 key is pressed. Contact us to set up this alternative.
- This principle of grouped modification is only valid for graphic interaction on the map. If you modify the coordinates of a waypoint analytically via its properties window, only this waypoint will be affected.
Toolbars (version 24.1)
- Some recent new tools were not present in the standard toolbars, and required the addition of a personal toolbar to access them. This is no longer the case, all tools are now accessible in all toolbars.
- By default, 2 toolbars are configured, one with tools relating to libraries and general tools such as zoom etc, and the other with navigation tools. However, it is possible to add tools from other categories in these 2 toolbars
- As some tools have been moved, you may need to redo your configuration. We advise you to proceed as follows:
- Reset the toolbars, using either the "View" menu => "Reset Tools", or individually by bar, by right-clicking on it, then "Reset"
- This will also have the advantage of revealing tools to which you would not have had access beforehand, due to not having created a personal bar
- You can then delete/add/move the tools according to your needs (see general chapter of the documentation)
- Personal toolbars are not affected and remain as is
- Essential in tablet mode, it allows the use of keyboard modifiers widely used by certain tools (see route handling below). But it can also be useful on PC to avoid having to keep a key pressed
- It is available via the "Display" menu => "Control keys"
- These buttons can also be added to other toolbars
- When one of these buttons is activated, it is as if you are pressing the corresponding keyboard key
Routes modifications (version 24.1)
- Adding points to an existing route: use the "Routes" tool combined with the "Ctrl" key
- When starting a route on an existing route, with the "Ctrl" key pressed:
- By clicking on the first point of the route, you can add points to the start of the route
- By clicking on the last point, you can add points at the end
- By clicking elsewhere on a segment of the route, you can add points between the point closest to the click, and the next point
- By finishing the creation of a route on an existing route end-point with the "Ctrl" key pressed, you extend it rather than creating a new one.
- When starting a route on an existing route, with the "Ctrl" key pressed:
- Joining existing routes: use the “modification” tool
- Move an end-point of a route to the end-point of another route, and press the "Ctrl" key before releasing the mouse button
- If the "Ctrl" key is pressed during the initial click, a new segment will be created between the 2 routes before joining them
- Otherwise, the clicked end-point of the first route will be moved towards the end-point of the second (Don't forget to press the "Ctrl" key before releasing the mouse)
- Split a route in two: Right-click on the route, and choose the “Split route” entry from the context menu dedicated to the route.
- By clicking on a segment: 2 distinct routes are created without joining
- By clicking on a point on the route: 2 distinct routes are created, the clicked point being present in both routes
- If you click on the first or last point (or segment) of the route, the "Split route" entry is grayed out to avoid resulting routes with only one point
- It is also possible to split a route using the Objects window
- Go to the details of the route showing the list of waypoints
- Right-click on the splitting point, then choose the "Split Route" entry from the context menu
- If multiple points are selected (i.e. highlighted in blue), the first route will go from the start of the initial route, to the first selected point, and the second route will start at the last selected point until the end. The points located between the 2 will be eliminated.
Navigation Control (version 24.1)
Instruments Interface (version 25.0)
From version 23.0, ScanNav is compatible with Wine and can be used on PCs under Linux, MacOS, and ChromeOS without using a virtual machine.
Unlike virtual machine environments such as VMware, VirtualBox, or Parallels, which create a complete emulation environment for a Windows PC by reserving part of the memory and disk space, Wine is only a very light interface to the system calls and the application runs in the same environment as any other native Linux or MacOS application.
For more information, please refer to the installation procedure on Wine.
The structure of the documentation has been revised in version 23.0 for better readability and navigation within it. You can also reduce the left index, or print the different pages with the "<<" and "print" buttons(1)(2)(3)
The documentation is natively available in French and English. For other languages, it is now possible to display it any language via automatic online translation(4).
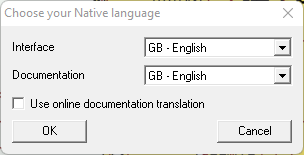
The choice is made via the language selector which opens during the very first use of ScanNav, or using menu "Help?" ==> "Choose your native language".
You can choose the language of the interface, and that of the documentation independently, as well as to consult it locally or online. This last possibility makes it possible to consult a translated version into any language.
When you choose the interface in French or English, the documentation choice automatically switches to the corresponding local language. And if you choose another interface language, the choice passes to an online translation. You must therefore first choose the interface locale, before changing the choice of the documentation language and mode of consultation if it is not appropriate.
The documentation contains chapters in Html and others in PDF. Html chapters are available in all languages supported by GoogleTranslate. Those in PDF have been pre-translated into German, Spanish, Italian, Portuguese (other languages available on request).
When consulting the online version of the documentation, the initial language is set according to your choice for the interface. You can choose another language at any time with the control at the top right of the page, similar to the one present on all the pages of the website.
(1) To print all content on pages with collapsible titles like release notes, be sure to click the "Expand All" link at the top of the page, otherwise only the titles will be printed.
(2) To print a translated version, please first scroll to browse the entire page, otherwise only the part already viewed will be translated.
(3) PDF pages print using the button built into the pdf viewer.
(4) Machine translation may cause some inconsistencies.
Starting from version 23.0 you can be notified of new available ScanNav updates. The setting is made in the "Other" tab of the preferences, using the "Check for updates" option, and by entering the period of in number of days.
By default, ScanNav is set to check for updates every 15 days. This requires having an active connection, but the volume of data exchanged is minimal (equivalent to a small SMS). You can of course disable this option or change the period.
If no Internet connection is available at the time of the automatic check,no error is displayed, ScanNav will check again the next time the application is launched, without waiting for the delay between verifications.
You can also check for updates manually using menu "Help?" ==> "Check for updates" or via the "About ScanNav" window.
For already registered PCs, the update mechanism also checks that your license is up to date with the server. If this is not the case, ScanNav will offer to update it. You will then not have to fill in the different fields of the form. In very rare cases, this automatic updating will not be possible. You will then have to use the registration form via the "Help?" => "Registration/Obtain License" and enter your activation code and coordinates.

- North Up(default): The map is displayed North up according to the standard of Nautical Charts.
- Compass Heading Up: The map will change orientation according to the compass heading. If no compass is detected, the Course over ground will be used instead.
- COG Up: The map will change orientation according to the Course over ground.
- Manual Orientation : The user can choose the desired orientation using the input field provided. In other modes, this field is grayed out and filled in with the effective value of the orientation
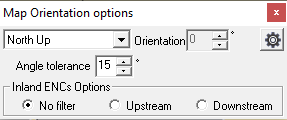
- Angle tolerance: This parameter is used to define a tolerance for the "Heading Up" or "COG Up" modes, in order to prevent the map from moving constantly. With a value of 15°, the orientation will only be adjusted if the heading/course angle deviates more than 15° from the current orientation of the map.
- Inland ENCs options: This option is dedicated to Inland Navigation, and more particularly to Inland ENCs. It allows you to filter the type of panels displayed depending on whether the boat is navigating on the river toward Upstream or towards Downstream.
From version 21.0, it is possible to start listening to the GPS and other Instruments automatically when launching ScanNav.
The settings are made in the "Navigation" tab of preferences.

- Check "Input instruments" to automatically start the GPS as well as all the other instruments declared in the "NMEA inputs" tab
- Check "Output instruments" to automatically start the Nmea transmission on the ports declared in the "NMEA outputs" tab
To avoid confusion about Navigation and Workshop modes, when ScanNav starts up, if you were in Workshop mode during the previous session, a confirmation request is displayed to ask for the desired mode. (Before version 21.0, ScanNav started in the last mode used)
Preamble: Unlike car GPS applications, which are limited to GPS tracking and therefore start listening to it as soon as they start, ScanNav has many functions that do not require GPS, such as navigation preparation, weather, track analysis, etc. It is also possible to connect a multitude of instruments to different ports. Listening to GPS and other instruments is therefore not activated by default at startup, but on explicit request. However, it is still possible to start it automatically as an option. See Startup options
Since each configuration is different, you must first configure the connected instruments. See the following chapters concerning the NMEA input and output settings.
If you have any problems with the settings, don't forget to consult the FAQ on the subject of connections
In previous versions, 2 independent buttons were used to start the Nmea inputs and outputs, without being able to differentiate the instruments. From version 25.0, only one button  is present in the toolbar to start/stop the input and/or output instruments, in a grouped way, or individually, as well as to visualize the status of each instrument, using the window below.
 This window is non-blocking and can remain open to monitor the status of the instruments.
It contains one line per configured instrument. Each line includes two buttons to start/stop the instrument in input and output, as well as a tab to visualize its current state.
This window is non-blocking and can remain open to monitor the status of the instruments.
It contains one line per configured instrument. Each line includes two buttons to start/stop the instrument in input and output, as well as a tab to visualize its current state.If an instrument is configured only as input, the button to start the output will be grayed out, and vice versa.
You can start each instrument independently with the corresponding input and output buttons, or all instruments at the same time, using the
 in input and/or output.
The color of the pellet indicates the status of the input instrument among the following:
- Grey: the instrument is not started, or has not yet finished its start-up phase
- Green: the instrument is started and receives useful information (valid position, etc.)
- Red: the instrument is started, but doesn't receives anything on the concerned port
- Yellow: the instrument is started and receives information, but nothing valid (for example no satellite for the GPS)
 button has the same colors as the pellet, but only reflects the status of the GPS, to the exclusion of any other instrument. Similarly, the icon at the bottom right of the screen remains present to reflect whether or not the GPS interface is working properly. This icon can take 3 states:
  : Everything is fine, and the GPS regularly sends positioning information to ScanNav.
 : The interface between the PC and the GPS is correct. They communicate well, but the GPS does not send positioning information. This may be due to poor satellite coverage (indoor use for example), or to a bad configuration of the GPS which does not send any of the sentences or PGN recognized by ScanNav
 : Means that you have a communication problem between the PC and the GPS. Check that the cable is properly connected and that the speed and interface parameters are identical on the GPS and the ScanNav settings.
You can choose whether or not to save the track, and the resume options. When enabling GPS, if "Extend the last known track" is checked, ScanNav will draw a line between the last known position and the current position to extend the last track, instead of creating a new track. Note that it is also possible to split or join tracks later on (see Splitting/Joining Tracks)
You can also open this help, or the instruments settings using the 2 buttons at the bottom right
Preamble: If you have any problems with the settings, don't forget to consult the FAQ on the subject of connections
From version 25.0, the settings of Nmea instruments have been simplified.
- The GPS tab disappears, and is integrated as the first instrument in the "NMEA Inputs" tab. In this tab, GPS-specific options are only displayed when GPS is selected.
- The 2 tabs "Inputs" and "Outputs" are synchronized at the common settings level.
The configuration of the GPS and other NMEA inputs is done via the NMEA Inputs tab of the preferences
The first instrument configured is necessarily named GPS. It cannot be disabled or deleted.If you connect your instruments via a central unit, you only need to configure the GPS instrument. You will also receive all other information (wind, heading, etc.) on this same instrument, and will not need to configure additional instruments.
The rule is simple: you must create one (and only one) instrument per physical connection (COM port, Ethernet, Wifi, etc.). And you cannot declare multiple instruments sharing the same physical port.
Note that the position information coming from the GPS will only be interpreted if it arrives on the first configured instrument ("GPS").

First, choose the communication protocol of your GPS (or other instrument) among those proposed. The entries preceded by an asterisk are only presented for the GPS instrument.
- NMEA 183 Generic: Concerns the vast majority of instruments in NMEA183.
- NMEA 2000: Several inputs are available, depending on the adapter you are using (Actisense, Digital Yacht, Miniplex), each having its own protocol to integrate Nmea 2000
- Note that some adapters translate Nmea 2000 PGNs into Nmea 183 (for example the Actisense NGW). In this case, choose the "Nmea 183 Generic" input
- (*)Internal GPS Sensor, and Windows ILocation: These are the protocols used by Internal GPS, mainly used for tablets. See the dedicated chapter.
- (*)Garmin: Garmin proprietary protocol. You must then configure the GPS model (see below). Note that Garmin GPS also support Nmea 183 or 2000 protocols. In this case, use the "NMEA Generic" or 2000 input corresponding to your adapter.
You must then choose the physical port number. This can be a COM port (Nmea RS232/422 port, USB, Bluetooth), or a network port (Ethernet, Wifi).
- For network ports, refer to the dedicated chapter
- For COM ports, you must choose the port number, as well as the speed parameters.
- To know the COM port number, you can use the configuration tool generally delivered with the GPS, or the Windows device manager which provides the list of existing COM ports, under the chapter "Ports (COM and LPT)", with a textual description that should help to determine the right port. Tip: To remove any doubt, you can plug/unplug the GPS or USB adapter, you should then see the corresponding COM port entry appear/disappear in the device manager.
- For the speed, refer to your hardware documentation. Most follow the standards, but this can vary and is often configurable on the instrument itself. The standards are as follows:
- Classic Nmea 183: 4800
- High Speed Nmea 183, used for AIS: 38400
- Nmea 2000:Variable depending on the equipment, generally 115200 or 230400
- The other parameters do not need to be modified, except in exceptional cases. The standard values are:
- Parity: None
- Flow control: None
- Stop bits: 1 (some older MLRs deviated from this rule with a value of 2)
- Data bits: 8
- If your GPS is configured on a COM port that is not in the list, you can add it using the "++" button. See Wifi specifics which uses the same principle to create ports.
communication delays: There are 2 types of non-reception alerts:
- Maximum time without communication: if no communication is detected from the instrument (e.g. faulty cable or GPS off): The default timeout is 2 seconds. If you detect untimely communication problems, the instrument may only send information at an interval greater than 2 seconds. You can therefore increase this value to solve the problem
- Maximum time without satellite reception: When ScanNav receives data from the instrument, but no valid positioning information (e.g. poor satellite coverage). The default timeout is 10 seconds, and can also be modified.
- It is possible to disable the alarms for each type, in which case no alert window or sound will appear. The color of the GPS button will however be changed to reflect the problem if a valid position is not received.
NMEA and PGN N2K filters: refer to the corresponding chapters NMEA filters and PGN filters
checksum: refer to the corresponding chapter
Active: If this option is unchecked, the instrument will not be listened to. Please note that it is not possible to disable the GPS instrument
NMEA Log: This option is very useful for diagnostics. Refer to the corresponding chapter
Adding/Deleting Instruments
If you have multiple physical connections (multiple ports), you must create as many instruments as there are connections. To do this, use the "New Instrument" button, enter a name and assign the parameters as defined above, making sure that "Active" is checked, otherwise it will be ignored.Use the "Delete Instrument" button to delete the currently selected instrument.
If you temporarily unplug an instrument, you can also disable it so that you can re-enable it without having to reset everything when you plug it back in.
Note that you cannot delete or disable the GPS instrument.
GPS-specific options
The following options are only presented when the selected instrument is GPS.- Model: This option is coupled with the choice of protocol. It is mainly useful to differentiate GPS for the old transfer mode between ScanNav and different old GPS (notably Garmin, MLR, Magellan, and Furuno). Documentation on transferring routes and waypoints. However, it is recommended to use the GPX file transfer mode when possible.
- Interpolation distance: This value is given in meters. Points given by the GPS that are less than this distance apart will be "averaged" to compensate for the GPS SA error. The accuracy achieved today makes the interest of this option much less than before May 1, 2000 when it was of the order of 120 meters. It remains of interest if you ignore the heading and distance data provided by the GPS to calculate them in ScanNav. If you put a value of 0, there will be no interpolation.
- Filter offset positions: This option allows you to filter inconsistent positions, which can occur during a strong interference of the communication cable, where the verification of the checksum is not enough to eliminate the corrupted sentences. See more details in the filter configuration.
- Ignore GPS heading and speed: These options are only useful on some GPS devices that give incorrect information
- Ignore date and time: Allows you to work around bugs in some older GPS devices (see Bug of April 6, 2019). If the option is checked, the PC date will be the correct one.
- Datum: Warning, changing the Datum can cause inconsistencies, and it is strongly recommended to leave it set to WGS84. A warning will be displayed if you change it. It remains accessible, but is reserved for advanced and informed use. See here
To configure outputs, use the "NMEA outputs" tab of the preferences. It will allow you to create multiple outputs. Until version 21.1, outputs were only supported in NMEA 183. Version 22.0 provides support for NMEA 2000 as output. See previous chapter for more details.
Version 25.0 brings several ergonomic improvements to facilitate the configuration of Nmea inputs and outputs:
- Presentation of the lists of PGN/Nmea sentences improved, with the addition of the label, and a tooltip to better visualize all the information.
- The instruments with same name in the Nmea Inputs and Nmea Outputs tabs are now synchronized.
- The modifications made on one tab are carried over to the other tab (protocol, port, etc.)
- The addition of inputs or outputs proposes by default the instruments not configured in the tab, and existing in the other tab
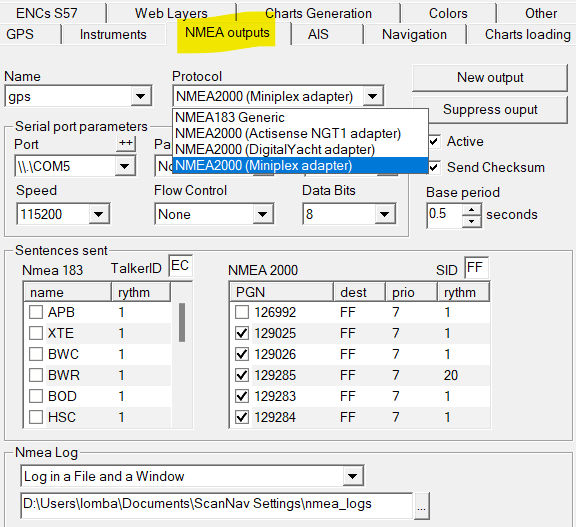
On first launch, no output will be configured. Use the "New output" button. You can choose one of the proposed names that correspond to the instruments configured as input (including GPS), or choose a new name if there is no corresponding instrument as input.
If it is a non-existing instrument as input, choose the NMEA 183 or 2000 protocol according to the desired output, and configure the port and speed fields according to the connection type. These parameters will already be initialized if you have chosen an existing name as input.
The Protocol and port parameters are necessarily the same for instruments with the same name configured as input AND output. If you modify one of these parameters, they will therefore also be modified in the input instrument with the same name, and vice versa.
If the input and output ports are different, you must therefore use different names. Furthermore, two instruments with different input or output names cannot use the same port.
Then, set the sentences and/or PGN numbers to send to the pilot or external repeaters (refer to the pilot/repeater documentation to find out which sentences/PGN it supports)
Active: If this option is unchecked, no information will be sent to this instrument
Sending rate: Starting with version 24.0, it is possible to define different sending rates for each sentence or PGN.
NMEA 2000 Input
The native NMEA 2000 protocol is supported as input since version 15.0, via the Actisense NGT1 adapter.
Support for Digital Yacht iKonvert or NavLink2 adapters was added in version 21.0, and MiniPlex adapters in version 22.0.
To configure the connection, you must first configure your adapter using the tool supplied with it, especially to select the various PGN filters for reception and transmission, the characteristics and speed of the communication port, etc... Please refer to the adapter documentation.
Then, in ScanNav, go to the preferences, "NMEA Inputs" tab, select (or create) the corresponding instrument, and choose the "NMEA 2000" protocol protocol (or model) corresponding to your adapter in the proposed list, as well as the corresponding COM or network port.
The speed parameters are initialized with the default values according to the adapter (115200 for Actisense and MiniPlex, and 230400 for Digital-Yacht). You should however check that it corresponds to the speed configured on the adapter itself.
Apart from exceptional cases, the other parameters must remain at their default value. Note that these parameters are not accessible for Actisense.
You can use NMEA 183 and 2000 instruments together by configuring multiple instruments on different ports. Note that the Digital-Yacht and MiniPlex adapters communicate NMEA 2000 data by encapsulating the data in a specific 183 sentence (!PDGY for Digital-Yacht, and $MXPGN for MiniPlex), and can also send other Nmea 183 data to the same channel. The 2 protocols will be recognized automatically by ScanNav.
Please refer to the adapter documentation for the different configuration possibilities.
The list of "PGN" (NMEA 2000 packets) interpreted by ScanNav are the following:
General PGNs:
- 126992: System Time
- 129029: GNSS Position Data (deactivates PGN 129025)
- 129025: Position, Rapid Update (only active if PGN 129029 is not detected)
- 129026: COG & SOG, Rapid Update
- 127250: Vessel Heading
- 128259: Speed
- 128267: Water Depth
- 130306: Wind Data
- 130577: Direction Data
- 129038: AIS Class A Position Report
- 129039: AIS Class B Position Report
- 129040: AIS Class B Extended Position Report
- 129794: AIS Class A Static and Voyage Related Data
- 129041: AIS AtoNs (Aids to Navigation) support.
- 129809: AIS Class B static data (msg 24 Part A)
- 129810: AIS Class B static data (msg 24 Part B)
- 130842: Simnet: AIS Class B static data (msg 24 Part A) (variant of 129809, ignored if PGN 129809 is present)
- 130842: Simnet: AIS Class B static data (msg 24 Part B) (variant of 129810, ignored if PGN 129810 is present)
- 129793: AIS UTC and Date Report (Base Station Report, msg 4 + 11)
From version 21.0 any PGN can be interfaced as a Sensor using a configuration file. A list of PGNs (130310 to 130316 corresponding to the environmental sensors - Temperatures, Pressure, Humidity) is configured by default in 22.0, and PGNs 127488 (Engine Parameters, Rapid Update) and 128275 (Distance Log)were added in version 22.1. It is possible to set up additional ones by editing the configuration file, but as this is a relatively technical subject, we recommend that you call in a technician for the implementation. We will provide technical information on request and according to the PGNs to be taken into account.
Refer to the documentation "Repeaters configuration" for more details on taking into account as repeaters and / or logging in the track for analysis.
Note: the General and AIS PGNs listed above perform specific functions in ScanNav and it is not necessary to configure them.
PGN Filters:
It is possible to filter PGNs and / or transmitting sources, in order to overcome the redundancy of contradictory data on the Nmea bus (for example several GPS connected on the same bus). Go to the "Configuration" dialog of "Misc. Sensors", or the "Navigation" tab of the Preferences, and click on the "N2K PGN Filters" button. A window will offer you 2 fields:
- PGN / Sources to block: These are the PGNs and / or sources to block
- Authorized PGNs: If this list is filled in, only the listed PGNs will be taken in account
- If this value is entered in the "to block" field, all PGNs coming from source 25 will be blocked, as well as PGN 130312 whatever the source, and PGN 130311 from source 32.
- Conversely, if this value is entered in the "authorized" field, only the PGNs / sources corresponding to these criteria will be taken into account.
NMEA 2000 output
Until version 21.1, NMEA 2000 was only supported in reception. The interface of the Pilot and other repeaters therefore always had to be in NMEA183.
Version 22.0 brings the possibility of transmitting on the NMEA 2000 bus, using Digital-Yacht and MiniPlex adapters compatible with Nmea 2000. A few adjustments were added in version 22.1.
Version 24.0 brings support for the Actisense NGT-1 and NGX-1 adapters, with significant improvements in version 25.0 regarding the initialisation of NGX-1. Support of others adapters will follow in future versions.
The configuration of the Nmea 2000 outputs is carried out in the "Nmea outputs" tab of the preferences. Choose the NMEA 2000 protocol according to the model of your adapter, which will bring up a choice of PGNs to send. To date (version 25.0), the list of PGNs supported for output is the following (It will be completed as and when in future versions).
- PGN 126992: System Time
- PGN 129025: Position, Rapid Update
- PGN 129026: COG & SOG, Rapid Update
- PGN 129283: Cross Track Error
- PGN 129284: Navigation Data
- PGN 129285: Navigation - Route/WP Information (starting version 24.0)
- PGN 129029: GNSS Position Data(except hdop etc.)
- PGN 130577: Direction Data (except set+drift.)
- PGN 127250: Vessel Heading (except deviation + variation.)
- PGN 128259: Speed (except water reftype, speed direction)
- PGN 128267: Water Depth (except offset, range)
- PGN 130306: Wind Data
- Check the desired PGNs entries under NMEA 2000. By default, all the supported PGNs are present and unchecked, with priority 7 and a destination address FF (broadcast)
- To change a destination or priority, click on the field, and change the value.
- The destination is a 2 Hexa-decimal digits value from 00 to FF, and the priority from 0 (higher priority) to 7 (lower priority)
- Changing the destination creates a new line with the PGN and new destination. It is thus possible to send a PGN to one or more instruments, without using broadcast
- Changing the priority does not create a new entry (it would not make sense to send the same PGN twice to the same destination with different priorities)
- Note: Depending on the adapters, you can also send a mix of nmea 183 and nmea 2000.
Starting from Version 14.1 ScanNav
can interface any instruments supporting NMEA over Wifi (or any other
IP network), using TCP or UDP protocols depending on the capabilities
of the instruments.
The parameters are set by adding a virtual port in ScanNav preferences:
 Open the GPS (or Instruments, or NMEA output) tab in the preferences, and
click on the button "++" next to the port choice.
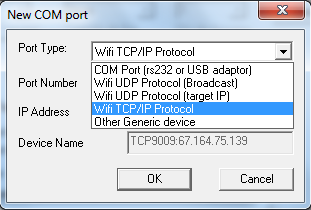 In the new window, select the desired interface from the dropdown list,
which can be:
- COM port: classic wired NMEA.
- UDP (Broadcast): listens (or sends) frames on a port number, which can be supplied (or read) by any external source(s).
- UDP (target IP): same, but allows filtering issuers by allowing only known IP. There may still be several sources, but all from the same IP.
- TCP/IP: TCP mode which is a point to point connection with only one source or destination, known by its IP address and port number used.
When you have the choice, and in the absence of recommendations , the easiest might be UDP, which allows to receive and/or send information from/to multiple instruments with only one connection.
TCP/IP enables secure connections and also lets you connect to instruments via Internet, such as AIS frames providers on the Internet. For example, you can test with port number 9009 port and IP address 67.164.75.139 which broadcasts AIS frames in the region of San Francisco. (IP address subject to change, to check the correct address, type "ping hd-sf.com" in a Windows Command Prompt)
The Device Name is determined automatically based on entered parameters. Once added, the port is stored under this name in the list of available ports, directly from the preferences window.
Internal GPS Support (Windows 8.1 and later):
Internal GPS found on Windows 8.1 tablets, do not support the NMEA
standards. They require a specific interface implemented in ScanNav
starting with version 15.2.
To set up your internal GPS, you just need to choose the "Internal GPS Sensor" model in the "Nmea Inputs"->"GPS" tab of the preferences.
All other communication parameters are useless and will be grayed out.
From version 24.0 a new model "Windows ILocation (Internal GPS)" makes it possible to overcome the non-detection of GPS on certain tablets which do not implement the complete protocol (or whose implementation has been modified by the installation of third party components). The latter allows positioning information to be retrieved, but does not provide certainty that the position was provided by a GPS. It is therefore preferable to favor the "Internal GPS Sensor" option if your tablet accepts it, and reserve the "Windows ILocation (Internal GPS)" as a workaround if your tablet doesn't detect the GPS correctly. If this is the case, we also recommend contacting the tablet manufacturer to report the problem to them. See also the FAQ on the subject
GPS Status Repeaters:
From version 24.0 new repeaters allow you to know the GPS reception status. The information comes from the “GGA” sentences for Nmea 183, from PGN 129029 for Nmea 2000, or from Internal GPS. These are the following repeaters which are managed as generic sensors (accessible via the “sensors” tab):
- HDOP (Horizontal Dilution Of Precision): The smaller the value (closer to 1), the better the precision. 1 is therefore the optimal value, a value between 2 and 3 is excellent, between 5 and 6 the measurement is considered good, beyond 8 the measurement is no longer considered acceptable.
- nb Satellites: Number of satellites taken into account for determining the position
- TypeFix: Quality indicator that can take the following values:
- 0 = Fix not available or invalid
- 1 = GPS SPS Mode, fix valid
- 2 = Differential GPS, SPS Mode, fix valid
- 3 = GPS PPS Mode, fix valid
- 4 = Real Time Kinematic. System used in RTK mode with fixed integers
- 5 = Float RTK. Satellite system used in RTK mode, floating integers
- 6 = Estimated (dead reckoning) Mode
- 7 = Manual Input Mode
- 8 = Simulator Mode
- Precision (only available on internal GPS): gives an estimate of precision in meters
Filter by Checksum:
The Checksum is a simple mechanism integrated into Nmea to check the completeness of the majority of sentences transmitted on the bus. However, some older instruments do not provide a checksum, and others even provided a bad checksum. The checksum box is therefore a 3-state button:
- checked: a valid checksum must be present in the nmea sentences. Any sentence without checksum or an invalid checksum will be ignored.
- checked in gray: accepts all sentences without checksum, but if a checksum exists it must be valid
- unchecked: this mode should only be used exceptionally when an instrument sends invalid checksums. No checksum verification is then performed.
Invalid position filters:
There is a recurring problem in nmea 183, linked to parasites which can persist despite the checksum principle, and which is generally a sign of faulty wiring. It manifests itself by sudden shifts in the track, most of the time with large vertical or horizontal lines.
The recommendation is to review your wiring, but as this problem is reported regularly, an additional filter is available from version 24.0. It can be configured in the GPS preferences tab with the following new options:
- "offset positions" allows you to activate/deactivate the filter
- "Tolerance" indicates from what distance from the previous point the filter takes effect. It is indicated in 10th of a minute in latitude/longitude. The value can range from 1 to 10, i.e. from 0.1' to 1'. It is 5 (i.e. 0.5') by default.
- If the distance from the previous point exceeds this value, it is set aside.
- If the position is confirmed on 3 successive points, then it becomes the new reference, and we continue on this position
- If the position returns sufficiently close to the previous one (i.e. below tolerance), then the points set aside are eliminated.
Other NMEA filters:
It is possible to ignore certain information coming from the instruments, in order to compensate for instruments sending contradictory or erroneous information on the Nmea bus. This can be done:
- Globally for certain information, whatever the source, from the "NMEA Inputs" tab of the Preferences, with "GPS" selected. This includes ground speed and route, as well as the time. The information is then calculated by ScanNav or taken from the PC clock.
Note: the "ignore date and time" check-box is a 3-state button:- Unchecked: date and time are taken into account
- Checked: date and time are ignored
- Checked+Grayed out: the date is ignored but the time is taken into account
-
Or more specifically, by eliminating certain Nmea sentences according to their identifier and/or the port on which they arrive. From the "NMEA Inputs" or "Navigation" tab of the Preferences, click on the "NMEA Filters" button. A window will offer you 2 fields:
- Sentences/Ports to block: These are the sentences and/or ports to ignore
- Authorized Sentences/Ports: When not empty, only the listed sentences will be authorized The syntax is the same for the 2 fields, namely a list separated by spaces, each element consisting of the start of the Nmea sentence (character $ or ! included) possibly followed by the character ":" and the port identifier (Instrument name assigned declared in the "NMEA Inputs" tab). The character '-' indicates any character.
- all sentences that start with !AX regardless of the port,
- and all ZDA sentences arriving on the GPS port, whatever the talkerID (i.e: $GPZDA, $IIZDA, etc...)
Example: "!AX $--ZDA:gps": will exclude (or include depending on the field):
Other changes valid for all types of GPS:
The background color of the GPS button changes depending on the status
of the GPS, so as to better draw attention in case of failure (was
previously only materialized with the little smiley at the bottom right
of the screen):
- When listening is not activated: background color identical to the other buttons
- When listening is activated its background color will be:
- Green if everything is functional
- Red if there is no communication with the GPS
- Yellow if the GPS communicates, but doesn't send any valid position.
Settings are done in the preferences tabs "NMEA Inputs", or "NMEA outputs", under the "Nmea Log" chapter. Here you have the choice of the logging level, that can either be "None" (default option), "In a File", "In a Window", or "In a File and a Window"
- Logging
in a window is mostly useful as a help to configuration, or to check
information coming from a port in real time. When this option is used,
all Nmea sentences received on the corresponding port will be displayed
in a window as soon as you activate the instruments. If you close this
window using the red cross at the top right of the window, it will
re-display as soon as it receives new data on the port. If you close it
using the "Close" button, the window will not reappear until you
reactivate the instruments. The number of lines in the log window is
limited to a maximum of 6000, after which older lines are suppressed.
- Logging to a file will save all received information in a file. This can be very useful in case you contact us for a support action to help detecting miss-configuration issues. You can also use them in conjunction with the Nmea Playback module so as to replay you navigations later on. They might also but useful for eventual future ScanNav enhancements to analyze your boat's performances. All log files will be saved in the folder indicated in the preferences.
New features in version 22.2:
New GFS models.
Various improvements: choice of timestep and duration on the MétéoFrance and MyOcean models, cancellation of requests, ...
New features in version 22.1:
Warning: Intermediate dates are the result of an interpolation between 2 deadlines, and even if they are consistent, they cannot be compared to a calculation from the model. Of course, you always have the option of displaying the model's deadlines by selecting them from the menu.
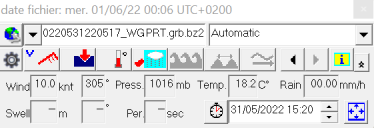
- The selection of the date is done on the same principle as for the currents, with a Date and Time selector.
- When you change the date in the Grib module, it is also changed in the Currents module, and vice-versa.
- The date is circled in red if the synchronization is impossible (i.e. if the grib and current files are on different time ranges)
- Synchronization is enabled by default. To deactivate it, uncheck the new box “Synchronize with…. » in the currents or gribs settings (general tab)
- The "current date" button is grayed out if the time range of the grib file (or currents) is outside the present date. Thus, if you analyze a grib from 3 months ago, the button will be grayed out because the grib does not contain the present date.
- A new option "use GPS date" in the Gribs, Currents,and water heights settings allows you to adapt the reference of the current date to that of the track when using the NmeaPlayback module to replay a past track, or visualize a routing with the gribs, currents, and water heights of the corresponding date. Note that the option is global between the Grib, currents, and water heights modules.
- Improvements on the Grib download interface
- Fixed areas and User on-screen selection are now integrated in the same interface
- Support of new providers (SailDocs, OpenSkiron...)
- Geographic bounds of models now displayed to put in evidence
- Possibility to filter providers/models.
- Interface with Great Circle subscriptions
- Interface with SailDocs
- Update mechanism to include new models as they are available on the server
- Improvements in the Email interface
- Support of precipitations from Grib files issued from the High resolution AROME and ARPEGE models of Meteo-France
- Improvements of performance on display of transparent layers of Grib and currents modules.
- The Grib Download interface is now launched in another
background
process, letting you continue interacting with ScanNav while
downloading. The User interface remains unchanged, apart from a new "On
Top" option that lets you keep the download dialog on top of the main
window.
- Support of Grib files issued from the High resolution AROME and ARPEGE models of Meteo-France (see Notes below)
- Support of multi-level
data (for example mean wind of Gust,
at surface or 10m). To choose between the different levels click on
data types buttons and choose the desired level amongst the
listed ones in the first menu entry. Example for the wind:

- Support of Gust winds
(wind sublevel), et water temeratures
(temperatures sublevel)
Starting from version 14.0
the GRIB module supports Ocean Current data provided in grib files. The
new button  in the Grib control window has the same behavior as for the other weather
parameters to control the display. Download of Grib currents is
directly integrated in ScanNav from version 15.1 with Grib currents
from the RTOFS model
issued by the Noaa (see notes on providers below)
See also support of Currents grib files issued from high resolution models of
MyOcean , via the currents module. See description
- Sort entries by date to address the problems that occurred with certain providers that provide data unsorted
- Original date of grib file shown in the title bar
- Availability of Météorem records for demo purpose. Can also be used without the GRIB
- The
 button in the control box enables a popup window to display information
under the cursor at the corresponding geographic
location.
Grib Download Interface
The downloading of grib files can be done directly from ScanNav, thus avoiding the extra communication related to browsing web pages.
You can download predefined fixed areas, or select the area on the screen.
Since version 18.1 of ScanNav, the 2 types of download are grouped in the same dialog.
You can access it via the "Options" menu, or button ![]() of the grib control box.
of the grib control box.
IMPORTANT: Since Internet access is done directly from ScanNav, you may have a warning from your firewall that ScanNav is trying to access the Internet. Acces must of course be granted, otherwise the download will not be possible.
The Grib Weather and/or Currents download interface are the same, only the models change. The different models are configurable and scalable, and may evolve independently of ScanNav versions. So it is advised to update the list of models regularly. It is possible to filter the list of models, so as to only display the useful ones. (please refer to the configuration chapter below)
"Dynamic" models (i.e. with the option of selecting an area on the screen) are displayed first.
Then come the predetermined models with fixed zones.
If you don't have the Grib module active, a list of archive templates, that you can use for testing purpose, is shown at the top of the list.
Choose a template from the list of providers. A blue frame allows you to view the geographic coverage provided by the model if it does not have global coverage. You can also use button  to center the chart on the covered area.
For information on the selected model, click on the link "Infos" at the bottom-left of the window (opens an external web page).
If the model is a fixed model with predefined geographic zone, the parameters are grayed out, they just allow you to view the coverage and available data. Otherwise, you can choose the different parameters according to the selected model:
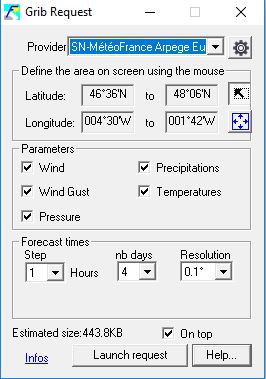
 , and draw the desired geographical area on the map with the mouse. The coordinates will then update in the window, possibly truncated to the available coverage if it is a local model. A red frame will materialize the area on the map
For SailDocs and SailaMail, the list of forecast times is indicated in the text field according to the parameters. It is then possible to refine by deleting individual times. Make sure not to choose too many time steps, which could end up in a server error.
An estimation of the file size to download is indicated. Although normally quite close to reality it may differ more or less.
Once all options choosen, click on "Launch Request" to start downloading or send the mail, according to the choosen interface for the provider. Note: If the area is not defined, or outside the provided coverage, this button will be grayed out.
Configuring providers
The grib providers starting with the prefix "SN" are hosted on the ScanNav server. Those that start with "GC" are hosted on Great Circle servers. At first use, only a generic "*** Configure Great Circle Models ***" provider is present to configure the subscription. When completed, the list will contain all models present in your subscription.
Please visit www.scannav.com/GB/Gribs.php for more information on available subscriptions and obtain your password.
It is recommended that you update the templates on a regular basis to take advantage of the latest services available on the servers.
To configure and update the model list, click the
 button to display a menu with following choices:
- "Filter models" : Lists the models in a new window, each with a check box. Just uncheck the check-box of entries that you don't want to show in the choice list. In addition, if the option "limit to visible area" is checked, models outside the area displayed in ScanNav will not be proposed.
- "Connection Settings" : Opens a new window that lets you configure your connection IDs and download method for the selected provider.
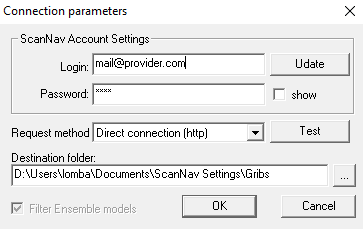
- Enter your username and password in the appropriate fields. If you check the "show" box, the password will be displayed in clear text.
- Choose the download method of Grib files in the field "Request method": Either "Direct connection", or by Email. For models hosted on ScanNav, you can then click the "Test" button to test the settings.
- Click on "Update" to update the list of models available from the supplier according to your subscription. Note: the pc must be connected to the Internet at this time (no update available by email to date)
- The "Filter Ensemble models" option is only available for Great Circle. It allows to ignore the individual variants of the models "GEFS Ensemble" to avoid overloading the list of choices.
- You can optionally change the destination folder where to download grib files. This directory is common to all models of all providers.
For Direct connection mode, the grib file will be stored in the specified directory, and opened in ScanNav upon completion of the transfer (after confirmation).
For Email-based mode, you must set up an e-mail tool that is compatible with the "MAPI" protocol (eg ThunderBird), so that ScanNav can drive it. In case your mail tool is not compatible, a window will show you the fields to be copied / pasted in the subject and body fields of the e-mail message.
The server will reply with an email including the grib file as an attachment. You will need to save the attachment to disk and then open it in ScanNav with the interface intended for (see Grib module main documentation).
Tip: You can also open Grib files with ScanNav directly from the Windows explorer or from an email. To do this, you must associate the extension .grb / .grb2 and / or .bz2 with ScanNav in the Windows settings.
Notes on the different providers:
Grib services hosted on the ScanNav server are provided free of charge for ScanNav users with the Grib module (and/or Currents module for currents grib). The list of models indicated on www.scannav.com/GB/Gribs.php is given for information only, and is subject to change. Thus remember to update the list of available templates regularly. (see Configuration of providers in previous chapter)
The server processes certain models such as those issued from MétéoFrance, MyOcean,
or GFS (from version 22.2), storing them locally to speed up processing.
Models are refreshed several times a day to store the latest forecasts.
The "Noaa GFS" and "Noaa Wave" models are also available with direct access on the Noaa servers.
In this case, ScanNav only acts as a gateway, the data being extracted from the Noaa servers at
time of the request, and then compressed before sending. The speed therefore depends on the availability of the Noaa servers at the time of the request, and is much lower than that of the new "GFS" and "GFS Wave" implementations available from version 22.2.
- Since version 23.2, the current calculation uses the internal calculation engine by default without displaying the height window. However, it is possible to display it by checking the “display curve” option in the currents module settings. In this case, a SNTides window dedicated to currents is opened on the reference port of the currents file, independently of other water height windows that may be open. The time taken into account in this window will be systematically synchronized with that of the currents.
- In previous versions, the water height data provided with SNTides (SHOMAR harmonic constants) was time-limited to 2 years from the year of the version (e.g. years 2010 and 2011 for a version broadcast in 2010). To calculate currents or water heights beyond this limit, it was therefore necessary to use the WXTide alternative, although the precision of water heights and tide times given by WXTide may vary from one port to the other. Since version 23.2, the default reference source is SNTides which is not limited in time. This possibility is therefore less useful but remains accessible, for example to choose the Shomar source until the end of December 2023.
New features in version 23.0:
New features in version 22.1:
New features in version 16.0:
New features in version 15.3:
New features in version 15.0:
- Choice of the time system: Starting from version 15.0, it is possible to choose the time system displayed in the Currents control window: either UTC, or Local (settings from your Windows system)
- Support of GRIB currents files:
Starting from version 15.0, the Currents module can read currents data
from Grib files of various providers. Unlike the existing SHOM UJA data
which have no date limits, GRIB files
cover a limited period. If you move the cursor outside of this period,
a warning will be displayed, and the date will be repositioned at the
GRIB's limit date. As for the SHOM data, it is possible to select a
specific entry in the list, or let ScanNav interpolate between two
dates. Download of Grib
files is done directly from the Currents control Window. Click the
 button and then
select the "Download GRIB files" entry. The interface then works
exactly the same way as for the download of Weather GRIB files. You
just need to choose the model; Define the area on screen;
and Launch request to start downloading. Please refer to the related
documentation "
Download by Screen selection" for the Grib module.
Older Enhancements:
Since
version 9.0, currents areas can be opened directly by right-clicking on
the map and using the "Tidal currents" entry of the contextual menu
which will show the list of files available for this area,
sorted from the most detailed to the most general.
Note: if the sub-menu "Tidal" does not appear, verify that you are on a
geographical area covered by the zones of UJA SHOM
The  button in the control box enables a popup window following the cursor
and showing currents information at the corresponding geographic
location.
Starting
from version 10.0, the tides module is interfaced by default
with
SNTides, which is based on the kernel of SHOMAR (©
SHOM 2010 Contrat n° 114/2010). It is limited to the 2 consecutive
years following the edition date (up to 2011 included for version
released in decembre 2009). You still can use WXTide to
calculated
currents for further dates. For this, set the "Tides Source" parameter
to "WXTides" in the general settings for the tides module.
Don't
forget to reposition it to SHOMAR when done, so as to benefit of a
better precision for dates before the limit.
For complete documentation of the SNTides
module,
please refer to the pdf
document.
GRIB currents providers:
The Currents module now integrates currents data issued from MyOcean models. The original data is processed several times per day by the ScanNav server to convert them in Grib format. For a description of the available models, please see the Currents module page on the ScanNav web-site.
Note: The list of available models changes regularly, and independently of the versions of ScanNav. Remember to update your models! (see Configuring providers in the Grib chapter above)
Note: Please select reasonable sized areas to limit the size of downloads and necessary processing on the server. Some models are restricted in geographic area size to limit errors. If this limitation is too restrictive, please contact us to define your need.
ScanNav is also compatible with other sources of Currents in Grib format available on the net.
New from version 21.0
- Objects window: The contextual menus (right click) on the different objects are enriched, in order to offer different operations on the selected elements (details, analysis, export, ...). The left part of the window now also benefits from the contextual menu, as well as any filters.
- Contextual menu on the map: It is now possible to export objects in different formats directly from the contextual menu. You can also perform an action on several objects at the same time, thanks to the new entry "Selection" of the contextual menu. The chosen operation will then be performed on all the selected objects. The "selected objects" designates the elements previously selected with the selection tool, and/or all the elements intersecting the clicked point.
- GPX Export: You can now choose to export objects in GPX format with or without the ScanNav extensions, these being problematic for some software/GPS. All you have to do is check or uncheck the "Include ScanNav extensions" option in the file chooser that opens to choose the name of the exported file.
New from version 20.1
New possibilities for Notes (text)
It is now possible to assign a font, size, and angle to each Note individually. The settings are made via the properties box (new fields available to choose the font, size and angle), or interactively with the modification tool (see below)
Interactive transformation of objects
Select the "transformation" tool from the toolbar, which will let you edit graphically the different types of objects. The applied transformation depends on the type of object, and on the use of keyboard keys.
- Moving Waypoints, Notes, Bearings and Filled Zones: Click on the waypoint, note, segment of the bearing, or within a zone with a fill pattern, move the mouse, and release the mouse at the new desired position.
- Moving unfilled areas, or routes: while pressing the <alt> keyboard key, click on the outline, move the mouse, and release the mouse at the new desired position.
- Adding / Moving points on a route, area, or bearing
- Click on a point on the route / area / bearing, move the mouse, and release the button at the desired position
- Click on a segment between 2 points to create a new point (except for bearings, where this operation moves the bearing)
- To add a point at the beginning or at the end of a route, while pressing the <ctrl> keyboard key, click on the first or last point of the route according to the desired operation, move the mouse, and release the button at the desired position for the new point.
- Deletion of individual points from a track / routes / areas: while pressing the <Shift> keyboard key, click on a waypoint, area, or track to delete it.
- Enlarging / Reducing: while pressing the <alt> and <shift> keyboard keys, click on the object to enlarge / shrink, then move the mouse towards the center to shrink, or out to enlarge, before releasing the mouse
- Rotation: while pressing the <alt> and <ctrl> keyboard keys, click on the object to rotate, then move the mouse to choose the angle, before releasing the mouse
- The only possible operation on tracks is to delete a point, other operations having no meaning (please contact us if you have any needs in this regard)
- For move, scale, and rotate operations, if a selection is active and you click on a selected object, the operation applies to all selected objects (except read-only objects, and tracks)
- Shortcut: You can move / enlarge / shrink / rotate an object as described above without having to select the "transform" tool, Just press the <alt> keyboard key, regardless of the currently selected tool
Older modifications
- Possibility to configure the type and size of the lines of the tracks / routes / bearings / areas, and to fill the Danger Zones with a pattern
- Possibility to setup the alarm sounds using either a sound file or a buzzer configurable in duration and frequency.
- The size and filling of the boat icon are now configurable (via the heading line configuration tool)
- Simplified adding custom waypoint icons with support of png files for icons, with predetermined transparency
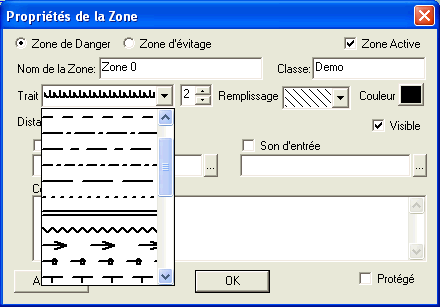
Formerly reserved for waypoints, this feature is now (from version 20.1) available for all types of objects.
Starting
from version 12.1, it is possible to associate an unlimited number of
links to a waypoints (was limited to one in previous versions).
- One photo stored locally, that will show up when overring the mouse over the waypoint.
- One or more URL to any active contents (remote web sites, or local files), with a specific title.
- Open the Waypoint property dialog
- Click on the "Photo/Link" button
- A Dialog box will let you enter the location of a photograph, and as many URL as you want.
- For each URL, enter a title, and the url. This can be an url to a remote web site, or the path of any active content file (video, word document, pdf, etc...)
- When moving the mouse over the waypoint, a popup window will appear and show in the following top down order:
- the text comment of the waypoint
- a preview of the photo if any
- the list of links (one per line) provided.
- When clicking on the photo preview, it will be opened full size in a separate window
- When clicking on the links, the active content will open in the associated application (web browser, multimedia player, etc...)
A safety margin to take the rule of the thumb (1)
In general, the browser takes two lines of security, a vertical that is called the pilot's foot, the other horizontal which is to move to a distance of submerged dangers. The user of the GPS will continue to take these two margins, and to apply the second rule of thumb: It provides, whenever possible, its path in order to spend more than an inch of submerged hazards at the scale which he serves.
This rule is a bit harsh in the port approaches that have been surveyed recently. In these areas, the browser will be able to enjoy fully and lucidly the accuracy of GPS.
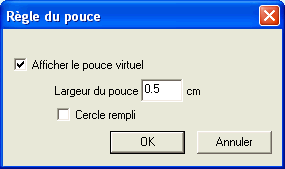
The "thumb" activates / disables the menu "Options" -> "Cursor" -> "Rule of thumb" which opens a dialog box to configure the virtual radius of the thumb and the display type (circle completed or not).
The measurement of the radius is expressed in centimeters relative to the printed paper to its original scale. On screen, the circle will be more or less depending on the level of zoom on the map.
Note: The thumb will not display for maps with a scale of origin is not known. (all charts containing this information)
Version 12.1 brings several major enhancements on the MOB function
- NKE MOB system interface
- By default, ScanNav is set to listen to the NKE MOB sentences. You may deactivate it in the "Navigation" tab of the preferences, by unchecking option "Watch NKE MOB"
- An alarm will be raised on reception of any of the 2 following NMEA sentences:
- $PMLR,05,01,02,0337*02<cr><lf>
- $TRWPL,,,,,MOB*21<cr><lf>
- General MOB system enhancements with dead-reckoning of the MOB position according to a given drift.
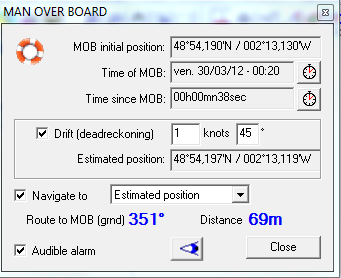 When a MOB condition is raised, either automatically by the NKE
system (or any other compatible system), or manually with the MOB
function integrated in ScanNav, a Waypoint is created on the current
position, and the MOB window is displayed:
When a MOB condition is raised, either automatically by the NKE
system (or any other compatible system), or manually with the MOB
function integrated in ScanNav, a Waypoint is created on the current
position, and the MOB window is displayed:- The audible alarm may be switched off by unchecking "Audible alarm" option.
- The navigation control is set to navigate towards the MOB position. This includes repetitors, and the autopilot if it is interfaced
- In case of areas with currents, you may set the speed and direction of the current so as to estimate the position of the MOB during time: A second waypoint is then created which will move according to the dead-reckoning system.
- You may then choose to navigate towards the "Estimated position" or the "Initial MOB position".
- the MOB initial position, date of MOB, and time since MOB are displayed
AIS and DSC MOB beacons interface
The AIS and DSC MOB beacons interface uses the same concepts as the NKE MOB, bringing in addition the real time updating of the MOB position through the AIS or DSC signal.Please refer to the new AIS documentation.
The  tool is used to create bearing lines. Click on the map on the landmark, and move the cursor while keeping the mouse pressed, then release at the end of the bearing line. By clicking on a point and releasing the mouse right away, a bearing between the clicked point and your current position will be initiated.
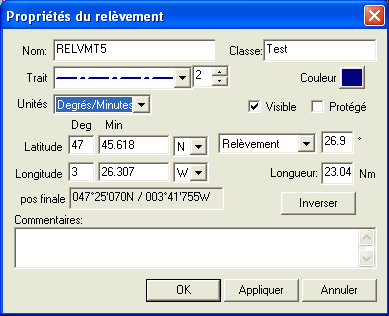 A window allows you to refine the settings before validating, by defining the display parameters, such as the type and thickness of the line and its color.
You can also define the angle of the bearing and the segment length (in nautical miles) before validating.
The bearing angle can be displayed in True or Magnetic bearing and/or Inverted according to your choice.
It is also possible to reverse the bearing using the "Invert" button, i.e. the end of the line becomes the point of bearing.
You can later on modify a bearing by opening its properties box, or by using the modifications tool:
- click on the segment to move the bearing line
- click on one of the 2 ends to change the bearing
An Anchorage Area is very similar to a Danger zone, the main
difference being that an anchorage area raises an alarm when exiting
the zone, while a danger raises an alarm when approaching and/or
entering the zone. On the other hand, it is possible to have only one
active anchoring area at a given time, whereas several danger zones can
be active simultaneously.
Version
17.0 adds the possibility to automatically call your DSC VHF
radio when in Anchor Drift Alarm conditions. Please refer to the documentation of the AIS/ASN/ARPA
module
An anchorage area can be defined in one of the following ways:
- With the new tool
 Available by creating a custom tool-bar. Click on this button, a
circular area is created around the position of the boat. Simply fill
in the desired turning radius, and validate.
 - Similarly to danger zones (tool
 ),
Just check the "swing area" option instead of "danger zone" in the
properties dialog box of the area
 - It is also possible to create a circular area with the
tool
 :
: - If the danger zone has only 2 points, the first point will be the center, and the segment defines the radius of the area
- If the danger zone has only one point (double-click on the map), a circular area is created, centered on the point, and with it's radius set to the last value of anchorage area
- It is possible to
transform an area of danger anchorage area, and vice versa by switching
the "swing area" or "danger zone" in the properties dialog box of the
area.
Starting from version 12.1, you can dynamically tune the level of priority of charts, so as to display higher or lower detailed charts, still keeping the same level of scale on screen.
- To open the charts priority control, use menu "Options" -> "Charts priority"

- Move the cursor to the right to use higher scale charts and to the left to use lower scale charts.
- The "Reset" button lets you reset the default central position corresponding to the typical standard scale level.
"Long Press" : Replaces the rignt-button click. Press and hold your finger on the screen one or 2 seconds before releasing to show the context menu or other "right-click" related feature.
"Pinch Zoom": Replaces the mouse wheel. Move 2 fingers appart / toward each other to zoom forward or backward.
"Pan/Scroll": Replaces the mouse middle button. Drag 2 fingers together to move around the chart without having to select the hand tool.
- All the repeaters can be displayed in transparency, which allows to see the map below
- To adjust the transparency level, go to the properties of the repeaters, then move the "opacity" slider to the right for more opacity, or to the left for more transparency.
- By checking the box "apply to all", the opacity level applies to all repeaters at the same time.
- The GPS simulator has been reviewed in particular on entering positions, and behavior of the double-click on the map that positions the boat and updates the course simulator.
- Ability to find invisible objects via the submenu "invisible objects" of the context menu (only appears if invisible objects are present)
- Bearing segment distance is now present in the Bearing tooltip
- The zoom tool now displays the result centered instead of left aligned on screen
- Several ergonomic improvements have been made to the Routing module, in addition to new concepts. See the documentation for the Routing module that has been updated.
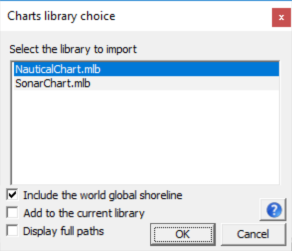
- If the "Include the world global shoreline" option is checked, the default small scale world coastline will also be added to the library. It is advisable to keep this option in order to maintain small scale global coverage.
- Check the "Add to the current library" to add the selected library to the existing one instead of resetting to start from a blank library.
- Check "Display full paths" to show the full folder name in addition to the file name Note: It is possible to select several entries, but it is not recommended to use different types of charts on the same area (for example SonarChart and NauticalChart), because ScanNav will switch from one type to the other without control. This possibility is especially useful for loading multiple geographical areas at once.
Contextual menus:
This clarifies on which object the actions are taken. Indeed, in the previous versions, entries were all inline in the menu, and it was not always clear which object it concerned. Above all, it now allows to interact with different objects intersecting the clicked point, which was not possible before. For example, clicking on a route waypoint, you can interact on the waypoint, or on the route.
Clarification of menus Export and Save...
"Export in Native format" now replaces "Save selected" which was confusing, as it is indeed a partial Export dependant on the selection and also the current selected tab. In counter part, "Save All" was renammed "Backup Objects Library", as it is a full backup that can be restored with "Restore Objects Library".
All Export menus are declined in "Selected", or "All".
- "All" means all entries appearing in the list of objects of the current Tab. For example, if you are in the "Objects" tab, all objects will be exported, but if you are on the "Routes" tab, only Routes will be exported.
- "Selected" means
just entries that are selected, i.e. highligted in blue.
Clarification of waypoints visibility scale, and choice of Waypoints Symbols:
- Zoom, Hand and Selection tools no longer gray out other tools
- The zoom tool has been improved to reduce the number of icons:
- single click = zoom in x 2
- single click + key <ctrl> = zoom out / 2
- The zoom in and out tools can therefore be removed from the toolbar (keyboard shortcuts are still valid)
- Configurable keyboard shortcuts (Specific request for fishing):
- configurable keyboard shortcuts to create instant waypoints with specific symbols. The keys q s d f g h j k l m w x c v are set by default, see comments in the file Accelerators.txt to modify or add them.
- Possibility to save (and display) the
track only by sections. (the question is asked during
gps activation / deactivation)
- Multi-window has been improved to display different views of the map and in different modes (for example a window in automatic mode and the other in manual mode)
- "Disabled" charts in the library may be displayed in manual mode, using the context menu ("Inactive charts" entry)
It is now possible, providing the compass interface, to take into account the surface compass heading in the heading line and the boat icon.
The heading line setting box has been revised accordingly:
 Choose the boat's orientation from:
- Compass: The boat's orientation on the screen then takes that of the compass, and if the heading line is checked, a 2nd heading line with the compass orientation is displayed in addition to that corresponding to the ground course.
- Ground Course: No consideration of the compass or the surface heading line.
The heading lines are only displayed when GPS listening is active.
-
- The length of the compass heading line can be adjusted with the corresponding slider.
- The ground heading line and its graduations can be set in distance or time, and in different units, by choosing the corresponding options.
New feature in version 15.0:
A new more standard scale chooser replaces the
existing one
  by default.
 It lets you choose the display scale using the standard conventions 1:XXXX used in paper charts, either by choosing a value in the list, or by entering the wanted scale followed by <enter>.
Although this new tool is used by default, it is still possible to use the former distance scale tool. To activate one or the other tool, go in menu "View" and choose entry:
- "Standard scale" : to use the new standard scale tool
- "Scale in distances": to use the former scale tool based on distances on screen
Both tools may also be used at the same time.
Please refer to the main documentation for a decription of the "scale in distances" tool.
The Visible Area tool has been reviewed in version 18.1 of ScanNav, and moved from the "Operations" menu to the "Option" menu. It now consists in a non blocking window that can remain open to facilitate it's reusability.

This tool lets you display in ScanNav a view centered on a given precise position and scale.
Enter the central position and scale of display, then click on button "Apply"- You can choose the input unit of the position between Decimal Degrees, Degrees/Minutes, or Degrees/Minutes/Seconds.
- Scale can be given in standard chart scale, or in covered distance between left and right of the screen.
 Use this button to fill the different fields with values corresponding to the present view displayed in ScanNav
 Use this button to create a waypoint at the position defined in the fields
The routes included since version 8.1C4 a planning tool with calculation of ETE / ETA on the road with the possibility to assign speeds for each segment. This is done in the properties dialog of routes:
- Click on the speed of a track segment already selected (highlighted in blue) to change its value, ETE and ETA are then recalculated.
- You can change the speed of several segments at once using multi-line selection

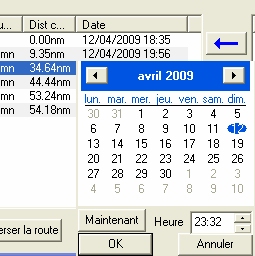
- Click on the date of a selected waypoint to amend the ETE other points are then recalculated
It is also possible to duplicate a route to facilitate the creation of a new route from an existing one: right-click on the route (on the maps or in the list of objects), and choose entry "Clone route"
Clarification of membership of waypoints to routes
In the "objects", the waypoints are now displayed with different colors depending on their belonging to a road or independent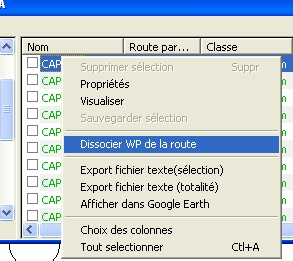
- black: independent waypoint
- blue: independent Waypoint used in one or more roads
- green: waypoint from the current route (in the routes details)
- rouge: waypoint from another route (but also used in the current route)
Starting from version 12.1, you have the possibility to split tracks in different segments, and/or join different tracks into a single one.
Before starting to manipulate, it is strongly recommended to save your existing tracks in a separate file as a backup; you will therefore be able to recover them in case of wrong manipulation.
1) To split a track in 2 segments: use one of the following possibilities:
- Right-Click on the track in the chart display at the location where you want to split it, and choose menu entry "Split track in 2"
- Or in the track details view of the objects window, right-click on a trackpoint and choose menu entry "Split track in 2"
2) to join 2 (or more) tracks in a single track use one of the following possibilities:
- The easiest way: In the "objects" window, select the tracks to be concatenated, then use menu "Edit" -> "Merge tracks" (you can also right-click on the selected tracks and use the contextual menu)
- Or on the chart, select tracks to be merged using the "Select" tool (use <Control> key to do multi-selection), then use menu "Edit" -> "Merge tracks"
Warning: merging of tracks is done according to the start/end time of tracks, and removes any overlapping time period in the second track.
You can fine tune the size of different elements of the interface, as well as texts displayed on the charts giving you a better reading, especially on Ultra High Resolution screens. As a general topic, default sizes for the different texts and icons are initialized according to your screen resolution to give you an appropriate reading. You may then tune most of them if the defaults doesn't suite you.
1) Tool bars buttons size:
Right-click on any tool bar and choose the "Buttons size" entry in the contextual menu to display the following window. Initial settings will depend on the resolution of your screen. Displayed values are in pixels
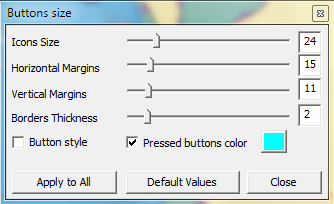 Icons Size: Move the ruler to the right to grow the icons size.
Horizontal and Vertical Margins: increases/reduces the space around the icons without scaling images.
Borders Thickness:
Lets you change the pressed buttons borders thickness to
better distinguish them.
Pressed buttons color:
You can assign a specific background color to buttons when in
the pressed state, so as to distinguish them even more.
NOTE:
It is advised not to use red,yellow, or green colors, as they are used
to put the GPS state in
evidence (see previous chapter).
Button style:
By default tool bars are now flat (no frame between
icons). Check this option to revert to the previous look with buttons aspect.
Default Values:
Click this button to revert to factory settings. Default values depend
on your screen resolution so as to propose the most adapted sizes.
Apply to All: Applies the
current settings to all tool-bars. Avoids having to customize each
tool-bar individually if you want the same settings for all tool-bars.
2) Common texts fonts:
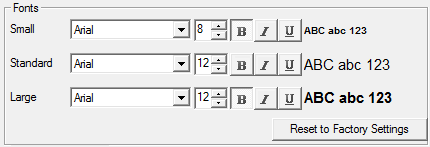 Settings can be changed in the "Other" tab of the preferences. Three different
fonts can be customized (subject to change for more individual settings
in later versions).
For each type, you may choose the font type, size, and attributes (Bold / Italic / Underlined)
"Default Values" let you revert to factory settings.
Small:
-
- Labels for gribs and currents displayed on the chart
- Labels for the different gribs and currents scale bars
- Labels for the Mercator graticule
- Waypoint names displayed on the chart
- graticules and labels for the Wind indicator and Heading correction displays
-
- Used for Popup Infos contents
- Used for simple text Displays and texts inside the Wind indicator and Heading correction displays
-
- Notes objects displayed on the chart
3) Scaling Waypoints icons:
Also available through the "Other" tab of preferences. A new ruler lets you scale waypoint icons.
Note: The scale factor is global to all waypoints, without distinction (no possibility to date to scale icons individually).
4) Precision of object selection:
 Since version 22.0 it is possible to adjust the precision of selection of objects on the screen, which could be too fine with the touch interface.
The setting is also made in the "Others" tab of preferences. Move the slider to the right for more tolerance in the selection.
5) Dialog size:
From version 23.1 it is possible to enlarge the dialogs in order to facilitate interactions on tablets or very high resolution screens. Just double-click on the title bar of the dialogs to switch them to enlarged mode, and double-click again to switch them back to standard mode. You can also configure the system with the options in the "Others" tab of the preferences:- "tablet mode" checkbox: If checked, all dialogs will open in magnified mode by default. The double-click is then reversed.
- "magnification factor" field: dialog size multiplier. The default is 1.5, which displays dialogs at 1.5 times their original size. You can enter a value between "1.1" (10% bigger), and "2" (2 times bigger).
6) ENCs fonts sizes:
You could already customize the fonts used in ENCs with previous versions. It nevertheless needed to be done systematically on Ultra High Resolution displays in order to have a readable result. This is no longer the case, default values now adapt themselves to the screen resolution and should look globally the same whatever your screen resolution is.The size of symbols displayed inside ENCs adapts automatically to the screen resolution so as to display at an appropriate default size. From version 21.0 it is also possible to apply a scale factor with the "Symbol size" slider in the "ENCs/S57" tab of the preferences.
7) Navionics charts text size:
Note: This concerns the old Navionics component for XP. From version 21.1, refer to the documentation for the new Navionics component.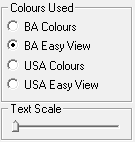 You can customize the size of text displayed inside Navionics charts using the "Navionics preferences" window (accessible through the "File" menu) providing a new "Text Scale"
ruler, that lets you apply a global scale factor to the size of all text features (sounds, names, etc...)
You can customize the size of text displayed inside Navionics charts using the "Navionics preferences" window (accessible through the "File" menu) providing a new "Text Scale"
ruler, that lets you apply a global scale factor to the size of all text features (sounds, names, etc...)To grow icons sizes, use one of the "Easy View" display settings.
- Automatic backup (auto-save) (starting version 19.0): The objects are saved periodically in order to preserve from unintentional pc shutdown/crash. The backup is performed as background process and does not interfere with real-time operation.
- Archiving: The automatic archiving of objects allows you to return to a previous state by restoring your objects at a given date, in case of mishandling, or other loss of data. Unlike the "auto-save" that happens in the background while running ScanNav, and overwrites the previous version, Archiving only happens when exiting ScanNav, and the data is retained for eventual subsequent recovery. The automatic archive can be generated either according to a user-defined period (by default 7 days), or in case of a ScanNav crash. There are therefore two types of archiving:
- Periodic Backups: They are created from a copy of objects when saving, in folder "[Documents]\ScanNav Settings\SavedConfigs", and with a name reflecting their creation date. For example "BackupObjects_2014-11-22_22h22.zrw" for a backup on November 22nd 2014 at 22h22
- Crash Backups: Those are generated in case of a crash, and contain the objects present at the time of the crash. Warning: this backup might be incomplete according to the severity of the crash. They are located each in a different sub-folder of SavedConfigs with a name reflecting the date of the crash. For example "[Documents]\ScanNav Settings\SavedConfigs\Crash_2014-11-15_02h30\curobjects.zrw" for a crash that happened on November 15th 2014, at 2h30.
The period of auto-save and automatic archiving can be defined in the "Other" tab of ScanNav preferences with the following:

- Check options to activate the auto-save and/or archive
- Define the period in
- number of Hours or Minutes for auto-save (default is 10 minutes).
- number of Days or Hours for archiving (default is 7 days).
- The Backup happens if the previous backup is older
than the current date increased by the defined period, at the time of saving objects
(i.e. when existing or saving explicitly). There is no intermediate
backup inside a ScanNav session.
- Defining a period of 0 (days or hours) will result in a backup done for each session or explicit save. To deactivate the automatic backup, uncheck the option instead.
- Backups are never deleted by ScanNav. You therefore might want check the allocated disk space periodically, and remove backups manually when not needed anymore.
To restore a backup or any other objects file, use the "Restore Objects Library" menu entry, accessible from the "File" menu in main window, or the Objects window.
WARNING: this will replace all your existing session objects that will be lost (except if you did a backup previously)
You may also use the "Insert Objects" that will preserve your existing objects. Routes and Tracks might in this case contain some double entries that you can remove afterwards.
Starting from version 18.1
Nautical guides and Object layers are grouped in the same window, with a tab for layers, and a tab for Guides.
To open, use button ![]() from the toolbar.
from the toolbar.
This window is now non blocking, which lets you quickly activate or deactivate layers without having to go in the menu. You can also resize it to take more or less space on screen.
For a description of novelties and full documentation of guides, please refer to the pdf documentation. New guides are added on a regular basis, the latest at the date of version 18.1 release concerns the integration of the SHOM wrecks database integration.
Layers coupled to Classes:
Layers are automatically created based on the class assigned to objects in their properties.
Layers can have multiple uses. Their purpose is to be able to show / hide a group of objects alltogether. An example of use can be to assign a default class for a given navigation season, so you can show or hide all tracks and other objects created during this season with a single click.
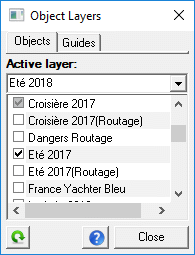 The "Active layer" defines the default class that will be assigned to any newly created object. It's choice can be made by selecting an existing item in the list (click on the arrow to the right of the field, or double-click on an element of the list), or by entering a new name. If the layer does not exist yet, it will be created as soon as a new object is created and automatically assigned to this class.
The existing layers are listed in the bottom part. Just check/uncheck the corresponding checkbox to show/hide all objects belonging to the same class. You can use multi-selection with the <Ctrl> or <Shift> keys of the keyboard to change several layers in one shot. A gray checkbox (like the first entry in the example opposite) means that only part of the objects from this class are visible. It is indeed always possible to display / hide individual objects independently using the objects property window.
To refresh the list, use the button on left bottom side of the window.Starting from version 14.0, the Objects window integrates a new search and filter function. This lets you easily find objets according different criteria, and not overload the list with invisible items. This function is also available in the Routes properties window, using the 'Filter" button.

- Text filter:
You can filter objects by just typing part of the name in the text
field. The search can be made on on ore more fields, such as the
object's Name, Comments,
or Class.
(check the appropriate options). No filter is applied if the field is
empty or none of the 3 options are checked. Filter can be case
sensitive or not.
- Filter by Visibility:
check the "Visible" option to
only show objects that are visible.
- Filter by Distance: check
the "Distance"
option, and give a maximum distance in nautical miles above which
objects will not be listed. When used in the Objects Window, the
distance is calculated from the location at the center of the screen.
When used in the route properties window, it is calculated from the
last selected (clicked) point. No filter is applied if the option is
unchecked, or if the distance is set to 0.
Note: The filter is not refreshed dynamically when panning the map on screen. To refresh, modify any option (for example check/uncheck any option)
Starting from version 13.1, You have the possibility to overlay web layers (Aerial/satellite images or other) in transparency over the charts, this with just a simple click. For a full description and documentation, please refer to the pdf documentation
- You can also visualize the current view in Google Earth (right-click menu on the map + 'GoogleEarth')
- It is also possible to display objects (routes, tracks, waypoints etc ...) in Google Earth. Very useful for sending your tracks to friends who are not fortunate enough to own scannav
- Either right click on a track (or wp etc.) on the map or in list view, then "Google Earth" from the context menu
- Or select one or more objects, and use menu "Operation" -> "View in Google Earth"
- It is also possible to frame a view in Google by pressing the F11 key on the keyboard and draw a rectangle. The area claimed will appear in Google Earth, visualized with 4 points corresponding to four corners of the rectangle. This will retrieve copies of screens to integrate easily as "pseudo" chart in ScanNav. See chapter "Workshop - Georeferencing" later in this document.
ATTENTION Google Earth Screenshots are not real marine charts and should not be used for navigation. However, they constitue and additional help, especially in certain regions of the world where recent maps are lacking. You will find below a small process to apply for quick results.
- Install good screen capture software (eg Gadwin PrintScreen)
- Configure this to take the active child window, and to save in a directory in jpeg format
- Start Google Earth, and configure it (display menu) so that there is the least amount of text and layers (compass etc) on the map (remove the status bar, etc ...)
- In ScanNav in navigation mode, press the F11 key then draw the rectangular area you want to capture
- ==> The defined view will be displayed in Google Earth, with 4 visible points corresponding to the 4 corners of the rectangle defined in scannav
- Go to Google Earth in full screen (F11 key) in order to have the largest possible area displayed.
- You can possibly readjust the view slightly by zooming / moving but making sure that the 4 points are still visible. In any case, Be careful to always keep North up, and zero tilt.
- Take the screenshot and save the result in Jpeg.
- In ScanNav, switch to Workshop mode on a new document, and insert the image
- Launch the georeferencing tool, go to the "Points" tab, then press the "Latest Google points" button to initialize the geographic positions of the 4 points.
- Click on "Apply" to have a first approximate referencing (allows to use "visualize" to move on the 4 points)
- All that remains is to move the four points to superimpose them on those entered in the screenshot, taking care to select the "Point displacement" mode (see " Workshop - Georeferencing" below in this document)
- Don't forget to press "Apply"
- Enter the general parameters of the map such as the name etc ... (the projection must be Mercator, and the Datum WGS84)
- Save the result.
To export / import objects in GPX format, you can use:
- The overall method using the menu "File" from the main window to export all objects,
- The selective method using the "File" menu from the Object window. Here you may export selected items.
The file must meet a list of prerequisites in order to be interpreted by ScanNav.
- The first line in the file determines the type of information for each column, and must match the following keywords. Fields are case insensitive. Those marked with an asterisk are mandatory.
- "Name" or "Nom" (*): name of the Waypoint
- "Latitude" (*): Latitude of the waypoint, see description of accepted formats below
- "Longitude" (*): Longitude of the waypoint, see description of accepted formats below
- "Class" or "Classe": If this column is present, it determines the class of the waypoint. If the column is absent or its value is empty, the name of the imported file determines the class of the waypoint.
- The content of columns with other identifiers will be added to the waypoint as a comment, prefixed by the column title if it is not empty.
- The following lines correspond to one waypoint per line. To insert a carriage return in a field, use the escape characters '\n', otherwise ScanNav will try to interpret the 2nd line and following as different waypoints.
- To generate an import text file, the easiest way is to fill it in Excel or another spreadsheet, and export it in "CSV" format (text separated by a delimiter)
- Lines starting with the '#' character are considered comments.
- The export must be performed with the following parameters:
- Character set: "Western Europe (Windows-1252/WinLatin 1)", or "ISO-8859-1".
- Field separator: "{tab}", or ";". Please note that the fields filled in must not contain this character, otherwise it will be considered as a column separator.
- Character string separator: must be empty, not supported by ScanNav.
- 51° 03,7’N / 51° 03,7’S
- 51° 03'7N / 51° 03'7S
- 51° 03,7N / 51° 03,7 S
- 51° 03,7 N / 51° 03,7 S
- N51° 03,7' / S51° 03,7'
- 51° 03,7 / -51° 03,7
- 51.0616683959961 / -51.0616683959961 (decimal degrees)
- the decimal separator can be '.' or ','
- the characters ° and ' are optional (unless used as a separator as in 03'7N)
To import a waypoints file in text format, use the entry "Import Waypoint from Text format" in the "file" menu. At the end of the import, the waypoints properties window is displayed, which allows you to modify some additional parameters.
- Support for the latest Garmin USB models
- And for RS232 models, Garmin protocol support for real-time navigation tracking (avoids having to change the protocol on the GPS when switching from real-time tracking mode to transfer mode, and vice versa)
- There are now three choices in the GPS tab of preferences for Garmin GPS:
- Garmin - NMEA: corresponds to the previous RS232 mode switching the GPS between NMEA for real-time tracking and Garmin mode for transfer mode
- Garmin - GRMN (RS232): also using a COM port, but the protocol of the GPS should be set to Garmin / Garmin permanently
- Garmin - USB: for Garmin GPS connected via USB
- Partial implementation for the transfer of waypoints and routes to the FURUNO GPS.
- Taking into account the magnetic heading in VTG NMEA sentence (when True heading is not present)
- Import as waypoints of the wrecks database from the SHOM cdrom (use text import described above). Note: Unless there is a specific need, it is preferable to use the guides functionality which now integrates the wrecks of the SHOM. (see guides documentation)
- Support Photo oblique referenced as Waypoints Maptech
Please refer to the updated documentation in pdf
Introduced in version 12.0 of ScanNav, Graphs let you analyze the different
navigation parameters captured during your trip (according to the interfaced instruments).
Version 19.0 brings additional advanced possibilities.
For a detailed description and documentation please refer to the pdf documentation
The new SAR module, available from ScanNav version 19.1, is intended for rescue professionals or volunteers at sea, such as SNSM. Please contact us for more information.
The new Radar Overlay module designed to work with Koden brand Radar-PC, is available in Beta version from ScanNav version 20.0. Please contact us for more information.Warning: Outside the framework of assistance by the support team, it is strongly advised not to modify the options present in this window
Modifications were made to the on-screen rendering engine in order to improve the fluidity on tablets as well as on PCs. The default settings should suit most configurations. However, if you have a powerful PC, or conversely an older small configuration, changing these settings may improve the user experience. These settings are accessible through the menu "Options" -> "Render options".The display is now calculated for the entire screen and an optional margin, before being displayed on your screen. To return to the previous behavior(not recommended), uncheck the "Buffered rendering" option. The display will then be done directly on screen which may cause little jolts, especially on tablets or when using Vector charts.
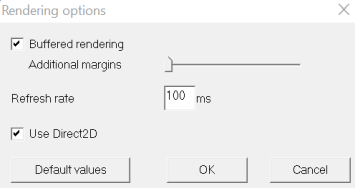 The margins are given in proportion to the screen from 0 to 100% using the slider.
By positioning it at quarter, ScanNav will calculate a quarter of the screen in addition to each side of the screen, which makes it possible to pan smoothly without refresh delays. By default, no margin is present (ruler slider on the left).
The margins are given in proportion to the screen from 0 to 100% using the slider.
By positioning it at quarter, ScanNav will calculate a quarter of the screen in addition to each side of the screen, which makes it possible to pan smoothly without refresh delays. By default, no margin is present (ruler slider on the left).On powerful configurations, it may be interesting to increase this value. On a small configurations, it is advisable to leave it at 0, these additional margins generating additional calculation time (up to 9 screens if positioned at 100%).
The refresh rate is specified in milliseconds. It corresponds to a delay before ScanNav recalculates the screen image after moving or zooming, so as to avoid jolts. This delay may possibly be decreased on powerful configurations.
Intelligence points for georeferencing allows you to move a point without changing its Latitude / Longitude
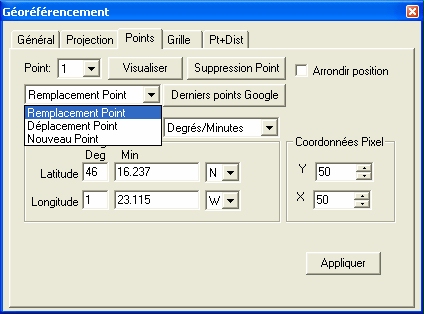 When you click the map to set a georeferencing, behavior depending on the choice among the 3 values:
- Replacement Item: click on the map the selected point is moved and values Longitude / Latitude modified accordingly (default behavior of the previous version)
- Moving Point: Click on the map the selected point is moved, but the values of Longitude / Latitude remain identical
- New Item: A new item is created, the values of Latitude / Longitude are initialized according to the current geo (identical to the old check box "New Item")
Please refer to the main documentation for other functions
The "Latest Google points" is displayed only if a view in Google has previously been requested (see Chapter Highest Google Earth), otherwise it is absent. By clicking above, all points are replaced by 4 points with their geo Latitude / Longitude initialized around the last area requested Google Earth (with F11). Points reference the 4 corners of the screen.This allows you to quickly reference a Google screenshot, you only have to reposition the four points on the image, taking care to select the "Move Point" not to change the longitude / latitude
Installation
The installer has been completely revamped.
- ScanNav is now installed by default in the directory according to the standard Windows ( "C: \ Program Files \ Marc Lombard \ ScanNav on a typical configuration of Windows).
- By default, no file is created in the installation directory. They are located in the subdirectory "ScanNav Settings" directory standard "My Documents" in Windows
- In the same way all the parameters written in the registry are in the section reserved for the current user
- ScanNav is now compatible with a user account rights retreints in XP Pro
- ScanNav is Vista compatible
Improvements ownership: In the first loading scannav (or when the library card is empty), the library card demo is loaded automatically, eliminating the "syndrome of the blank page." (This assumes of course have downloaded the full version contains maps of demonstration)
Version available in Italian

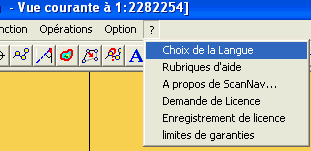
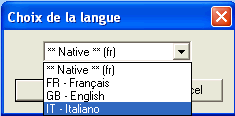
ScanNav is now available in French, English and Italian
Interfacing with Google Maps: Right-click on the card, an entry "Google Maps" in the menu. Enabling this entry shows a satellite picture of the location via Google Maps. This requires, of course, be connected to the Internet.
Support photos georeferenced MrSid format (more info here)
- Support aerial photos of the French coast in Lambert projection (http://siglittoral.test.application.equipement.gouv.fr/) through a passage in module import Lambert (more instructions here)
- Support satellite photos from NASA projection UTM (download from https://zulu.ssc.nasa.gov/mrsid/, global coverage)
- Requires an extension of license free and available upon request at the moment
- Requires an additional module for more instructions, see here.
Integration of an update patch. The principle is as follows:
- The patches are stored in a single directory. By default, this is the subdirectory "Correction" of the installation directory ScanNav. You can change this folder in the Preferences tab "Loading cards". (In what follows, the name of this directory is implied if not specified)
- The patches will load automatically, depending on the file name of the card. Thus, it is very important to give the names of significant map files, and all different. For example, if you have 2 cards in different directories named toto.map (C: \ carte1 \ toto.map and C: \ carte2 \ toto.map for example), they will all look the same 2 hotfix related to " toto.map "(ie without taking into account the directory name) which pose a clear problem if it is not strictly the same card. It is possible to globally disable or patches by checking the "search for the patch cards ..." in the preferences (tab "Loading cards"). In this version the maps already loaded should be charged for the change to be effective. (In navigation mode it is best to revive scanNav).
- There are 2 types of corrections:
- Georeferencing patches: the patches general (georeferencing, datum, zone waterway ...) There is one file for this file, for example card 7070.map ", the file will be named" 7070 . map_cor.map. This patch does not require images, there is no associated directory (7070.map_cor_files).
- Image patches. These mini-maps (eg from the "Export minimap") from adjusting and superimposed on the original map: there are as many pictures as patches, corrections are indexed on 2 digits, from "01". For example, to map "7070.map" we can find 2 patches named "7070.map_patch01.map" and "7070.map_patch02.map. Also associated subdirectories (7070.map_patch01_files and 7070.map_patch02_files) containing images corrective. The corrections are incremental, ie a correction of higher index appear on top of a correction index lower.
- Creating patches is a
workshop mode.
- Fixes georeferencing, waterway area, etc..: Loading map mode Workshop, make the appropriate changes on geo-referencing, and save the result with the new entrance to the "file" menu: "Save geo fix". A dialog box "save as" opens on the patches directory with the file name prepared as defined above. It remains only to confirm.
- Image patches: Use the "Export Zone" (menu "functions") as described in the literature to create a "mini map". In the dialog box to save the result, the patches directory and the name of the minimap is prefilled based on the name of the chosen card, and patch already. For example, if the patches 01 and 02 of the card 7070.map are already present, it will 7070.map_patch03.map. Just so as to validate the geo backup. Then as described in the documentation of mini-cards with the image change Navcor, paint, etc.. The minimap is then loaded automatically, there is no need to integrate it into the library as before.
- In Navigation mode, it is now very easy to open up a map to check /
correct mode Workshop. Simply click the right mouse button and select
the "Open Mode Workshop" without having
to browse the disk to search.
Support of
Jpeg format and PNG format for entry into
the workshop:
The scanners deliver the most part jpeg and png images, these formats
were added to the list of formats supported.
Note that JPEG is an image format that, even if he has a good
compression rate on disk, taking up much space in memory (24 bits,
compared to mapping formats 4 or 8 bits).
It would therefore make a reduction of color
to these images to optimize their use.
The same is true for some variants of the png (or tif).
Mechanism for the protection of objects
(waypoints, etc.).: Objects can be "protected" to avoid bad manip
deletion, moving, etc..
involuntary. Simply click the new box
"protected" in the properties of the object.
Other protection against handling errors:
- A confirmation is required before any removal of items
- The objects are saved within the
curobjects.zrw "at the end of the session, or on explicit request.
To
avoid
problems related to poor preservation of this file (such as lack of
disk space, or crash Windows when saving, etc..), The previous version
was first renamed "curobjects.zrw.bak" before to perform the backup.
In case of disappearance of objects, it is
possible to restore the previous version.
However:
- Warning: file curobjects.zrw.bak did not recall that the immediately preceding version. In case of disappearance of objects, should be curobjects.zrw.bak rename this file before leaving ScanNav, otherwise it will be overwritten. It is anyway highly recommended safeguard valuables in a separate file in order for the return in case of problems, the file "curobjects.zrw" only a working file to retrieve objects from a session on the other.
- Attention: the notion of object "protected" described above do not include backup of this object in a separate file, the backup procedure therefore also applies to those objects.
- Quick reminder: The tracks are also included in the file "curobjects.zrw. However, as the case of objects being "progressive", a mechanism for automatic backup of the current trace in a separate file already exists (see documentation for the settings). The generated files are then not used directly by ScanNav ( track is in file curobjects.zrw), but it is possible in case of a problem file to go curobjects.zrw reload manually from the saved files automatically
Association of photos to waypoints: It is now possible to associate a photo to a waypoint. This is done in the properties of the waypoint (field associated picture). The photo appears on the screen when you pass the cursor over the waypoint and "tooltips" are enabled.
- The photo appears with a maximum size. To see it in its original size, just click on it, it will open with the associated Windows application.
- It is possible to link any type of asset in place of a photograph. If this is not an image, it will be well understood by displayed in the tooltip, but by clicking the tooltip, the associated application is launched. Examples:
- "c:\video\sequence.avi": Open Windows Media Player or other application associated with the avi to play the movie "sequence.avi" on the screen
- "http://www.scannav.com": open Internet Explorer on the site ScanNav
- etc...
Grib New Module:
- Taking into account the swell direction, and frequency of the wave when available
- some facilities
such as the possibility of having a single color (see interface must be
understandable)
Other:
- Request for confirmation on stop listening GPS, to avoid false arrest involuntary manipulation.
- Possibility to assign colors to individual routes, tracks and areas of danger
- View menu-> Waypoints / routes / etc. to temporarily hide objects (waypoints, etc..) speeding the display scale for the particular weather
- Improving
the monitoring tool navigation (accessible via
 ): The waypoints can be sorted by their distance
from
the current position (before sorting was limited to sorting
alphabetically or by distance from the point selected.) This allows to
find very quickly the waypoints close to the current position, very
useful, for example, after marking man overboard
- New licensing system to move to reinstall Windows (the old licenses are still valid)
- Possibility to ignore the speed and direction given by the GPS, for certain power level at which send wrong information. When these options are checked (tab "gps" preferences, ScanNav itself calculates values based on the positions and dates. It is important in this case to give a significant value interpolation (about 40m)
- Flash danger zone when they are on alert (before they changed color)
- Info bubbles trace: display all stored information (winds, probe, etc.)
- Cards Support Maptech BSB 5.0
- Some ergonomic issues and fixes small problems.
